Nightmares from the Deep: The Siren’s Call Walkthrough 10
Follow our crystal clear walkthrough and helpful tricks to get you through the rough spots! Click the button to download full walkthrough.
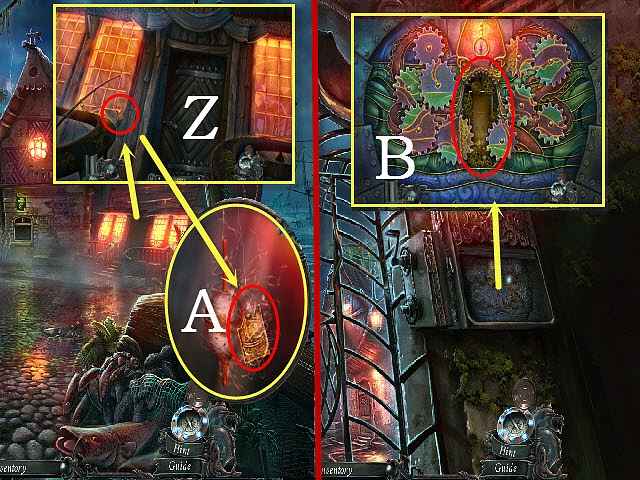
Examine the Tavern and select the fishing lure; use the DAGGER on it (Z) and take the 2/2 MECHANISM PLATE (A).
Return to the Archway and look at the gate.
Examine the mechanism and press the button; place the 2/2 MECHANISM PLATE and the GEAR on it to activate a puzzle (B).
To solve the puzzle, arrange the cogs so that they complete a whole image.
Please see the screenshot for the solution (C).
Enter the Promenade; select the carriage.
Examine the door; look at the handle and select the knob to get the COIN (A1).
Walk forward to the Gate; walk left to the Dilapidated Harbor.
Select the sheet three times and move the bar (B1).
Examine the doors and open them.
Move the net and open the suitcase; move the fishbone and take the CIRCLE HALF (C1).
Return to the Archway; examine the stall to activate a HOP.


 REFRESH